Daisypath Anniversary tickers

Little N

Lilypie Kids Birthday tickers

Little M

Lilypie First Birthday tickers

Saturday, April 19, 2014

Numero Tres

While being pregnant this round, a typical conversation with the random public would go like this:
P: "Your second?" 
Me: "Nope" 
P: "Oh your first! How is it?" 
Me: "It's my third actually..." 
P: (look of shock on the face) "wow!!!" Or "The SG government will be so thankful!" 

Lol! I have had many "flattering" remarks about how young I am to have three kids already... How brave, etc and some even asking me if I will venture for another. 

This pregnancy had caught hubby and I by surprise. Sometime when baby M was 8 months old (ie September 13), my breast milk supply dipped. Originally I attributed the drop to my flu... After recovering, the supply did not return and instead dipped further. I was absolutely puzzled and upset, since I was 3 months away from my aim of 11 months- N was TBF for 11 mths. The supply had dipped so much that the combined yield from 4 expression sessions and adding another before I went to sleep was simply not enough for a feed. After one week and getting bitten by M three times during one latch session, I gave up breast feeding... 

In the same month, I started having smell sensitivities especially fishy smells. I remember returning home one day and exclaiming to MIL that the fishy smell in the house was making me nauseous. That dinner I did not touch the plate of prawns (the culprit) and MIL wondered aloud if I was pregnant. 

MIL's comment triggered me to do home tests. Well, who would expect 3 negative results to be false negatives? I tested a total of 3 times over a month - twice using home test kits (w first morning pee) and once at Raffles Medical Group before the pre-employment x-ray... 

So how and when did I know I was pregnant? Fast forward to December, I was not feeling well - bad headache and aching body. The company GP looked at me and then my tummy... Part of the conversation:

D: when was your last menses?
Me: (suprised) June? 
D: So long ago? You have irregular menses? 
Me: I am breastfeeding so irregular menses is kinda "normal"? I am intending to go back to my gynae to make sure I am ok. 
D: Hmmm... Did you do pregnancy test after missing your menses? 
Me: yes, three times in Sep! All three times negative so I don't think I will be pregnant. 
D: That's like 3 months ago... Do you want to re-test? 
Me: mmmmmm.... Ok lor... 
D: The urine test will be $15, not included in your company insurance. Is that ok? 
Me: Ok (since i didn't know when I could get an appointment with my gynae)

After doing the pee test, I went to inform hb - that doc suggested a pregnancy test. I remember saying to him: "aiyah can't be one la... Test 3 times negative..." The nurses called us in (they were smiling widely at me) - I sat down, hb stood next to me. The doc pushed the strip across the table. On it, two dark lines. Oh yes, I know what it meant... But the doctor said it anyway "As you can see. Two lines. You are pregnant.".


Disbelief! I was happy yet in serious doubt... How was I going to face my boss (being in the new job for only 3 months)? Hb's reaction was "So how many weeks is she?". (Yah, funny question from an experienced father. Which test kit tells you the number of weeks?)

After the discovery, I made the appointment with gynae. Hubby was of course elated and I told him I might be more than 16 weeks because I felt movements in my tummy (which at that time, hubby brushed off as "stomach wind- you are hungry"). During the appt, gynae proded my abdomen and annouced "already quite big!". And indeed, the scan indicated that baby was already 18 wks! 

The first ultrasound picture: 

Hubby was of course shocked beyond words. Pregnant the wife is but 18 weeks is beyond the 1st trimster. All he could say was I watched too much "I didn't know I was pregnant...". 

Esentially I had spent the 1st trimster doing things which pregnant mummies would never do: 
- eating sashimi however much I liked
- having beer (one count) with my colleagues (one and a half pint) 
- taking an x-ray for my pre employment (shld have been 6-8 wks then) 
- taking flu vaccination (shld have been 10-13 wks then) 
- running 7km SCB Ekiden Run (I can't really run but you know i pushed myself a little more than usual) 
- having more than a cup of tea or coffee daily
- wearing a tummy clincher for 4 weeks until one night while lying down in the clincher i felt some movements in my abdomen (the tummy started to stick out and a male colleague actually pointed to my tummy then signaled a pregnant tummy and mouthed "are you pregnant?". I remember laughing out and telling him "NO lah! i am just fat!")

Luckily, the detailed scan at week 23 was  normal and that was when I broke the news to most of my friends. Here's an ultrasound of baby's side profile during late 2nd trimster.


Time flies and I am already week 37 plus. Like the first two, I am excited to meet this little one. Maybe because its number three, still feeling cool and "relac one corner". 

Even the sign up for the cord blood donation was just completed. Really put it in late this round! But better late than never! ;) 


Sunday, April 06, 2014

My Bloom Photo Shoot


It's my third pregnancy and hubby says possibly the last - so we decided to do a photoshoot to remember this last pregnancy. The 3rd pregnancy is not run in the mill for me because it came as a surprise (more details in another blog post).

For now, this is the photo shoot done at The Studio Loft. They shifted from Chinatown to their temp location at Joo Chiat and this shoot is taken at their permanent new location - Oxley Bizhub... The place is in Ubi, nice quiet place and very new with little tenants. Luckily we had a little guidance from Joanne, we were still kinda lost because the Security decided to close off the main entrance to the Basement Parking that we were suppose to go to. Nevertheless, you can still get to the basement parking by heading to the second building on the left - turn right into the one way, go straight all the way and turn right - you will see the basement entrance on the right. As for Lobby B which brings us directly to the studio, park at the areas where the car park pillars are painted with two red-orange-y strips.

It was a really fun photo shoot and I enjoyed myself very much. Thanks to Maryann for the wonderful and beautiful photos! :) I did take some tummy pictures using semi-transparent fabric for personal collection (yup so they won't be posted anywhere on the internet) - not that I have a to die for nice looking thighs or super big and nice looking tummy to boot (keke...).

The only photo where M was "forced" with her cheeks on my chest... LOL!
Who's the serious one in the family?

And suddenly, she shows a small ray of sunshine...
 
Like this photo! :)


*muacks* for being so glum the whole photoshoot...

This is actually the last of the series but the cutest
as N got to play with the face paint left over from M's birthday party...
Dipping her fingers into the paint...

The artist in action!
Bingo! That's the correct spelling for "BOY". There was no need to erase and re-spell the word. :p

The happy N with her "work of art"!
This is a photo that says "See I spell the word "BOY" correctly hor!"


Brought along a pair of boy socks as props... (this hubby uh... tsk tsk! where is the ring??!!!
Sidenote: Hubby then reminds me, EH HELLO! My ring is on the left hand LAH! *Opppssss*)
Love this picture although M is not smiling...
(Seriously, not easy to capture a toddler who is not co-operative!)


Didn't post the series of photos where hubby was staring "murderously" at me
in a bid to make his double eye lids appear... They are quite hilarious looking actually...
What more can I say? *Loves*
Uh huh... This is one of those not-so-"murderous" look photos...
In desperation to get M into the picture...
(Tip: Place her favourite food on my belly button, in picture her in action
picking up the rice crisp cracker)
M just cannot stop munching!
 
I do not know why M has that expression...

With food in her hands again!
Love this picture of myself... So ending this post with this photo!
(buay tahan myself sometimes...)

Monday, February 17, 2014

The first family "run"

This is an ultra back-dated post. Wrote it sometime back but never got around to posting it up with some photos...

Hubby signed the family up for a 5km Safari Zoo run. This run is in memory of Ah Meng, the very famous orang utan ambassador of Singapore Zoo. Little did he expect that I would get pregnant and be in my third trimster on the day of the run... The plan was to have N run with us while M is placed under my MIL's care.

Since I was not in the condition to run, we decided to bring M along and i would push her in the pram... It was our first Safari Zoo Run- the flag off was suppose to be 10am, we reached the outside of the zoo at abt 9.55am and only entered the zoo multi storey car park at around 10.15am. The traffic condition outside the zoo was horrid - very slow traffic... In all we were about 1/2 hr late and didn't get to run in the Safari zoo area which meant we only clocked about half the distance of about 2.5km. 

For me its a relief! And they captured a photo of us! Cool eh! ;)

During the run, we took some photos of the kids having their water parade. The magic words to make N run faster - "cold 100 plus up ahead!".


After the zoo run, baby M had her fish and egg macaroni in chicken stock for lunch. The rest of us had western food at Ah Meng Cafe. Expensive but still edible... We were expecting the KFC at the children play area to be ultra crowded (which turn out to be the case). Baby M thankfully was asleep after her lunch. 


We did a little walking around - visited the new polar bear enclosure. The kids loved the new display where there was a mini eskimo igloo which was pretty cold! Check out baby M! 


I think the most pitiful of all was hubby. I pushed the pram while he carried both kids- M on the pognae carrier while N was piggy backed... 

The whole day ended with waterplay (i hid in KFC in the aircon) and the animal/pet show at the kids area. M & N enjoyed the show and N got to stroke the cute dogs.  That marks a tiring day-  hubby was most tired among us... I guess he will think more than twice before signing up for such runs in future! :p

Monday, January 13, 2014

Weaning Recipe - Vegetable Stock

This is a very versatile stock which I love making for weaning babies - its oil free and vegetarian (for parents who don't want to intro animal proteins so early). I make batches of this (enough to last for at least a week) and freeze them using the Avent VIA cups after making them on the weekends. The stocks can be kept frozen up to 2 weeks. Idiot proof - trust me. 


The good thing about stock is you can add them to porridge or even use it as a soup base for steaming veg/meats and even that chawamushi! 


Ingredients 
1. 1/4 to 1/2 of the whole Chinese Cabbage (also known as Wong Bok) ~ the elderly says that its "liang" so you can replace this with Beijing Cabbage 
2. 3-4 stalks of celery
3. 2 large sticks of carrots 
4. 1 stick of corn 
5. 1-2 large yellow onions (depending on size of the onion) - cut into 8 quarters 
6. Tomato (optional, I only add this when baby is older)
7. Chicken/pork/beef bones (if u wan to enhance the flavor/sweetness)

Method
1. Wash and chop up the ingredients. 
2. Throw into pot and add even water to cover all the ingredients. Bring to boil. 
3. Allow to simmer for 1.5 to 2 hrs over stove or until the vegetables are "mushy". 

I don't really like to keep tabs on the stove so I will usually my trusty slow cooker. Which I will set to 4 hours. The stock comes out really nicely and I do not need to worry about the soups boiling over or "drying" up. ;) 

Have fun!

Saturday, January 11, 2014

Baby M's first year birthday bash - the preparation...

Baby M's birthday celebration planning started simple- we had wanted it to be elsewhere and for N and other kids to have lots of fun. With the help of a friend, we manage to secure the Aloha chalet 3 months in advance. The good thing about the chalet is it came with 2 square tables and 20 plastic (those kopitiam type) chairs! Perfect for big gatherings/party.

PS: we had a good laugh at "Jacana" - "jiak ka na"-hokkien for eating preserved olives

PARTY THEME

Somehow rainbow just popped in my mind - happy and full of hope. Hubby thought that it would be fun to tie the theme to the 2014 horoscope - Horse. I was quite crazy about "My little pony" and with rainbows it was natural that Rainbow Dash became the chosen party mascot. With the theme settled, I did an amateurish looking invitation which was sent to guests...
This time round hubby also did a DIY photo shoot for mei mei - and I found a photo with her "signature" smile to put in the invite...


A separate "reminder" invite was also given to guests who were coming one day before the party. ;) 


ACTIVITY PREPARATIONS

Preparations started two months prior to the party. The idea was to have activities that will keep N and other kids entertained. The choice for me was clear- art related activities such as window art... (Sand art was too messy to my liking- IMHO) So the hunt for a vendor started. There were event companies which provided the service at exorbitant prices and the cheapest vendor I could find was not available.... (Sigh)

Beads Station
Disappointed, I explored an activity which was featured by an event company- using beads to make key chains or bracelets. Lucky for me I managed to find a cheap supply of raimbow coloured beads and accessories (including rainbow coloured string) from Taobao. Just a week before the party, I got N to sit with me to sort the alphabet beads... ;p as you can see from the picture, we were only half way thru' the big bag of beads!!!


Foam Art (Photo Frame)
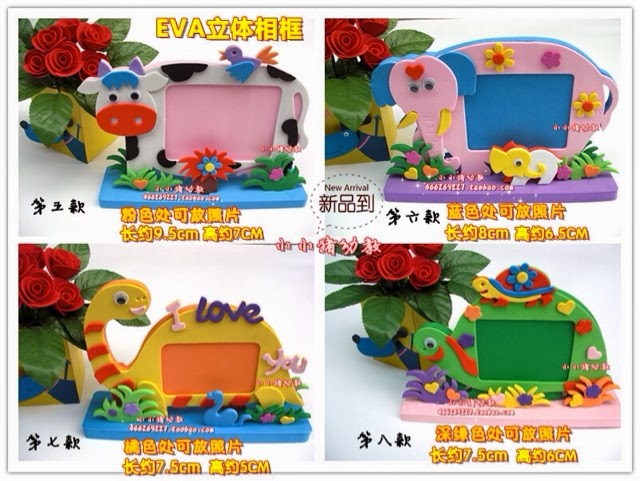
The other activity which was planned was for the kids to make a foam art photo frame. The original intention was to use my phone to take pictures for the guest and print them out using the Canon Selphy. Hubby warned me that I was trying to do too much! *bleah* But it was too late- I had ordered the foam art from Taobao and it was on its way to Singapore! So the kids would do the foam art on the spot or bring them home to do. :)


Tattoo/ Face painting 
I met this lady during a Christmas road show at AMK hub. She was doing face painting for kids with an event company. I was impressed because she drew very well. I took the opportunity to ask if she could do free lance. She agreed and gave me her telephone number. Closer to the date, she told me to choose 8 characters. You can see the 8 characters below (yes! It included minions because I thought most of the boys won't want a pony tattoo...)


As you can see here, she actually practised at home prior to the event (see below). I asked if she had photos of the tattoos she drew during my party. I guess she was too busy with the never-ending supply of kids wanting to get tattoos so she gave me her practise photos. Such dedication! What more could I ask for! Her name is Sufang and you can contact her at 9652 9630 if you are interested in getting her for your party. ;)


PiƱata!


I first broached the idea to hubby who was a hesitant about the feasibility. I convinced him that doing a "1" would be super simple using cardboards which we had plenty at home. Hubby was naturally horrified when he learnt that piƱata was meant to be beaten till broken.  He was later convinced by a non-violent version - the pull string piƱata. During my research, I saw a dad who did an impressive Beagle piƱata tutorial (which I also showed hubby for fun). 


Almost 2 weeks left to the party, there was still no piƱata!!! With the stress of "delivering" what the invite promised, we finally got down to it. To which, hubby enthusiastically announced: "Let's do a pony piƱata! The video looks simple enough...". And so, the nightmare of ME slogging to complete the piƱata began... 


Step 1- Create a paper mache ball (a blown up balloon was used) as the tummy to hold sweets in the piƱata... 


Step 2 - After the balloon paper mache is dry, hubby used strips of cardboard to build a skeleton around the balloon for the body and head... Empty cans were used for the legs... 


Step 3: I was supposed to fill the gaps with newspaper to puff the pony into shape (i forgot!) before paper mache-ing the whole thing.


I DIY-ed about 3 batches of starch (see photo) to complete the mache for the whole pony.


Step 4: Hang up the whole thing for it to dry! As you can see the pony looks odd because I did not feel the gaps with paper to puff it up... :( 


Step 5: COLOUR the pony. The video tutorial showed the guy spray painting it. That's the fastest method since the paint would cover up the newspaper mache "prints"... I didn't want to spend more money buying spray paint so I used masking tape to tape up the whole pony and painted it blue (colour of Rainbow Dash) using N's Crayola paint... 


Step 6: Add the finishing touches... Hubby used cardboard to cut out the wings and ears... I dyed the cotton twine using N's Crayola paint. The eyes and logo was printed from the computer and cut into shape for pasting. Finally, the Rainbow Dash piƱata was "born" in the nick of time - on Thursday - 2 days before the party! (PHEW!) All that was left was to cut the bottom and fill it up with SWEETS!


THE MAMA-SHOP CORNER 


This was mainly an inspiration from a Dec 08 mummy Jinny's  birthday bash for her #2. She had a really pretty candy table which she DIY-ed. Hubby supported the idea so I got down to planning "rainbow" items for the table. I went crazy wanting to buy fruit loops, Paddle pop ice cream, yakult, jelly beans and everything rainbow. Hubby brought me back to Earth with "Hey don't go overboard hor!". 


And so, with hubby's warning in mind, I searched around for a "cheap" candy source. Finally chanced upon a shop which not only sold candies but also some old school snacks. I secretly decided to make half the table offer "retro snacks". Hubby was working on Friday so I went to the candy shop alone - if hubby's warning wasn't ringing at the back of my mind I would have bought everything on the shelves! 


Inspired by Jinny, hubby said we could do bottle labels like her too. So 3 designs were put out and hubby chose the rainbow (though I got most votes for the polka dot one). 


They were initially printed on normal paper but tore off easily when wet. The labels were eventually printed on photo paper instead... 


I also printed little cake toppers for the Twelve cupcakes (mini) which my younger sister sponsored for the party... These were also printed on photo paper and cut out using a circle cutter... Toothpicks were pasted behind the paper. ;) 


The final DIY item on the table was rainbow agar agar/jelly. With the help of my niece, nephew and N, we made the jelly on the night before the party... 


DECORATIONS 


Hubby took charge of the fancy decorations and I manage to "coerce" my poor brother in law to blow balloons for me and hang them up on the day of the party. It was during this  "fancy decoration" exercise, that I learnt of my nephew and hubby's talent in balloon sculpting... My nephew was so addicted he could not stop making dogs, swords, flowers and many other designs from the balloons. 


Hubby made three of these and my nephew made one. Not too bad I must say for amateurs like my nephew and hubby. ;) 


Look out for my next post - on the day of the celebrations...